Let's continue from panoramic talk #1
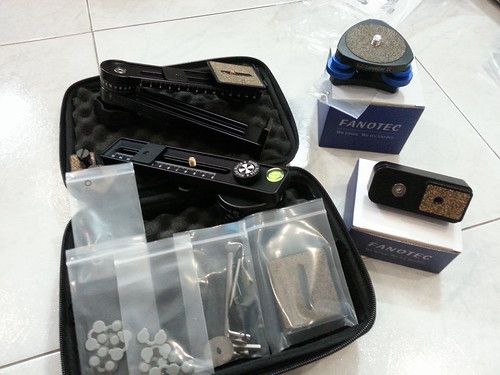
A good rig is a must to do a nice and beautiful 360 view. As there are many such head in the market, do take your time searching for it.
So, what is Nadir and Zenith.
A picture worth the thousand of words.
This is Nadir (facing down)
This is Zenith (Facing down - left)
This is nadir adapter
If you have realise something. I can shoot zenith without any tripod in my view, how about nadir?!
The tripod is right in the frame, how do I remove that?
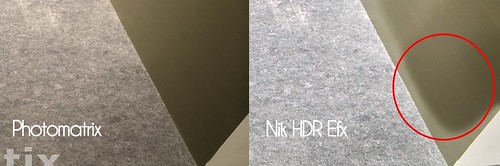
Yes, you can do that by using content aware on Adobe Photo shop! That's awesome, right?! But... not entirely correctly! If you are using on grass, cement floor with no lining or pattern, you are safe!
If there are patterns on floor, you will be scratching your head seriously.
Look for Florian Knorn on Youtube video
He teaches a lot - framing, photo taking and calibrating to your nodal point.
You may want to check out his website as well.
So, now let's get back to nadir adapter. How does it actually work?
It is very simple, and I can assure you!
All you need to do is loosen the screw below, push the entire top head till the end (showing in the photo - nadir adapter)
Then, loosen the turning knob on the nadir adapter, move the entire top head (see photo below)
See? That is so simple! But this is not the end yet.
Remember you are on nadir view, seeing the tripod? Now with the nadir adapter, you will not see any tripod blocking you anymore! (just a little bit)
Wait! Hang on first before you go on and try it out.
When you are shooting nadir, you need to shoot at the exact spot where your lense is initially pointing to. If the floor have a star design while your tripod is on it, you need to shoot that star without the tripod - the same spot again.
Now, all you need to do is move the tripod backwards. You need to be certain where the lense is pointing initially, then ensure the lense is pointing at about the same point while moving the tripod.
Here's some photo in case you are going crazy and having headache!
What is what I am trying to explain. Looking at the image (the bottom tripod), that is the initial point. The top tripod in the image is using the adapter, trying to get back the same position so that it stitch well in the program.
Look at how they do it - tuck in the tripod, and how they position it.
It is wiser to have the leg spread out as seen in the image because, if one of the leg is open fully or so, you will get the tripod merging together.
But that is the not the scariest part since we can DI on photo shop or using content awareness.
The only headache I often have is the shadow. Tons of DI to be done because of that.
Here's another illustration for better understanding:
All thanks to Nodal Ninja who had this nadir adapter. It helps a lot when doing nadir shoot.
When you have done enough of 360 view panoramic, you will tend to get more of your own idea. How to solve individual issue, what cause the main problem when doing pano.
I will be glad to share my thoughts with you.
Thanks for supporting my blog.
Read More
A good rig is a must to do a nice and beautiful 360 view. As there are many such head in the market, do take your time searching for it.
So, what is Nadir and Zenith.
A picture worth the thousand of words.
This is Nadir (facing down)
| Camera lense facing down is known as nadir. Photo credit: Nodal Ninja |
This is Zenith (Facing down - left)
 | |
| Left: camera lense facing up - Zenith. Photo credit: red door vr |
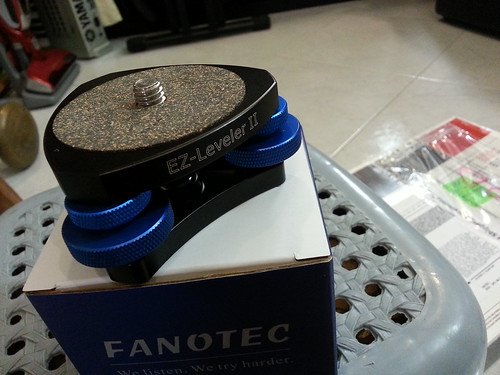
This is nadir adapter
 | ||
| Nadir adapter Photo credit: Nodal Ninja |
If you have realise something. I can shoot zenith without any tripod in my view, how about nadir?!
The tripod is right in the frame, how do I remove that?
Yes, you can do that by using content aware on Adobe Photo shop! That's awesome, right?! But... not entirely correctly! If you are using on grass, cement floor with no lining or pattern, you are safe!
If there are patterns on floor, you will be scratching your head seriously.
Look for Florian Knorn on Youtube video
He teaches a lot - framing, photo taking and calibrating to your nodal point.
You may want to check out his website as well.
So, now let's get back to nadir adapter. How does it actually work?
It is very simple, and I can assure you!
All you need to do is loosen the screw below, push the entire top head till the end (showing in the photo - nadir adapter)
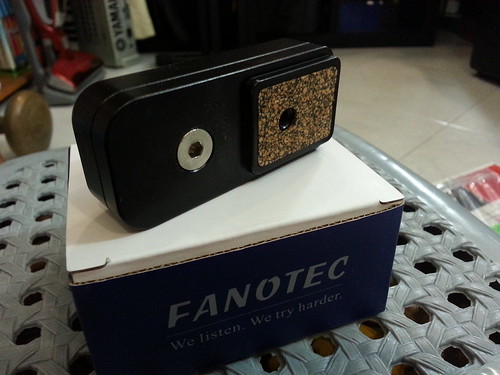
Then, loosen the turning knob on the nadir adapter, move the entire top head (see photo below)
| After loosing the turning knob, you move the head 180 degree. It is very sturdy |
See? That is so simple! But this is not the end yet.
Remember you are on nadir view, seeing the tripod? Now with the nadir adapter, you will not see any tripod blocking you anymore! (just a little bit)
Wait! Hang on first before you go on and try it out.
When you are shooting nadir, you need to shoot at the exact spot where your lense is initially pointing to. If the floor have a star design while your tripod is on it, you need to shoot that star without the tripod - the same spot again.
Now, all you need to do is move the tripod backwards. You need to be certain where the lense is pointing initially, then ensure the lense is pointing at about the same point while moving the tripod.
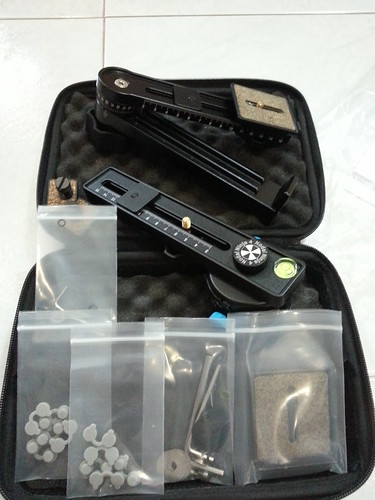
Here's some photo in case you are going crazy and having headache!
 |
| Nadir adapter Photo credit: Nodal Ninja |
Look at how they do it - tuck in the tripod, and how they position it.
It is wiser to have the leg spread out as seen in the image because, if one of the leg is open fully or so, you will get the tripod merging together.
But that is the not the scariest part since we can DI on photo shop or using content awareness.
The only headache I often have is the shadow. Tons of DI to be done because of that.
Here's another illustration for better understanding:
 |
| Photo credit: Nodal Ninja Forum |
All thanks to Nodal Ninja who had this nadir adapter. It helps a lot when doing nadir shoot.
When you have done enough of 360 view panoramic, you will tend to get more of your own idea. How to solve individual issue, what cause the main problem when doing pano.
I will be glad to share my thoughts with you.
Thanks for supporting my blog.